If it is a thing, I think my blog needs it.
It has been over a year since my last post. I really enjoyed blogging, but life got in the way. I returned to teaching in the fall and sent my little one off to preschool. I started teaching a new grade level (2nd....LOVE!), at a new school (really close to home), with a new team (LOVE them!), using Common Core Standards (new to me), and my district adopted a new reading and math series. To say it was a whirlwind year is putting it mildly. I am now teaching at the school my daughter attends. It's so nice going to school with her. Our lunch times overlapped by a few minutes, so I could chat with her for a few minutes during the day. It was great! My son started preschool at our church last fall. He LOVES it! I am so proud of how well he adjusted. His teacher was amazing and always kept me informed on things he was doing and even texted me pictures during the day. It made going back to work a lot easier.
Next year I will be teaching second grade again (yay!!). I'm so glad I'll be able to fine tune what I did last year. I'm working on stuff this summer to use next year. I'll have to add some posts of my projects.
During our family vacation I read The Book Whisperer by Donalyn Miller. It was awesome!!! Have you read it? I just started her second book Reading in the Wild today when I was working out on the elliptical. It's great so far. She has really changed my thinking on several things. What books are you reading this summer?

Tuesday, July 1, 2014
Sunday, April 28, 2013
Toy Cars at Home and in the Classroom
This week the kids and I have been playing with our ever growing collection of Hot Wheels and MatchBox cars.

It has been a ton of fun! We have made a car show, a parade, a car wash in the tub, and had races on a ramp. One afternoon we decided to sort our cars by color. Madalyn is working on patterns in school so I had her use the cars to make various patterns (AB, AAB, ABC, AABB, etc.). It got me thinking about how much fun it would be to use toy cars in the classroom. Here are some of the ideas I came up with. The mats I made were just quick drafts for pictures and to let Madalyn play with. I plan on making some mats on the computer that I can use in the classroom.


It has been a ton of fun! We have made a car show, a parade, a car wash in the tub, and had races on a ramp. One afternoon we decided to sort our cars by color. Madalyn is working on patterns in school so I had her use the cars to make various patterns (AB, AAB, ABC, AABB, etc.). It got me thinking about how much fun it would be to use toy cars in the classroom. Here are some of the ideas I came up with. The mats I made were just quick drafts for pictures and to let Madalyn play with. I plan on making some mats on the computer that I can use in the classroom.

Sorting cars by color. You could also use blank sorting mats and have your students come up with other ways to sort (by type of vehicle, number of doors, newer or older models, etc).


Using the cars to make patterns.

Sight word mats that students can use to trace, or drive the letters of the word.


Letter or number mats that students can use to "drive" the shape of the letter or number.

This is a sight word parking lot. I made it last summer to help Madalyn learn her sight words. It's an idea I saw on Pinterest. I wrote a sight word on each parking space and had index cards with the sight words on them. I would pick a card and read the word aloud. Madalyn would then "drive" one of her cars to that word and "park" in that space. It was a lot of fun!
I think students would really enjoy using toy cars as manipulatives. Most of our cars were less than a dollar each. Sometimes you can find them on clearance at Target, or even find sets of cars that would be cheaper than buying them individually. I'm going to start picking up a few for my classroom every time I go to Target or Walmart. I should have a good amount by fall when I'm back in the classroom. I hope you can use some of my ideas in your classroom!


Wednesday, March 20, 2013
Writing Center Idea/Repurposing Old Greeting Cards
Hi! It has been a few weeks since I posted. Life has been keeping me very busy. I have missed blogging, so I am hoping to get back in the swing of things.
Today I have an easy writing center idea for you. If you are like me you probably have several old greeting cards hanging around. Don't toss them in the recycle bin just yet! I have a fun way for you to repurpose them. Cards with cute, funny, or interesting pictures on them can be great story starters for your students. All you have to do is cut the words off the front of the card. Here are a few examples of cards I decided to use. I trimmed the cards so that all the wording was off.


Next, glue a piece of card stock inside the greeting card to cover all the writing. On the card stock I wrote words that students might need help spelling if they were writing a story about the picture on the cover. You could also add story prompts on one side of the card and word spellings on the other. I want to use the cards as story starters for creative writing so I opted to not use any prompts, but I could always add them later. Here is a picture of the inside of some of the finished cards.

I hope you enjoy today's writing center idea!
Sunday, March 3, 2013
Adding a Pin It Button
I recently got a new blog design from the amazing Alicia at Dream Like Magic. Love it! After the install, I noticed that my "Pin It" button disappeared. I just added it back today, so feel free to "Pin" away!
I learned how to add the "Pin It" button from a great tutorial on Kevin & Amanda's blog. You can find that post here. I have found lots of other great tutorials and information on their blog. Make sure you check out their great blog!
I learned how to add the "Pin It" button from a great tutorial on Kevin & Amanda's blog. You can find that post here. I have found lots of other great tutorials and information on their blog. Make sure you check out their great blog!
Friday, February 22, 2013
Spelling/Sight Word Practice Part 3
I have a few more spelling and sight word practice ideas for you today. The first one I call Spaghetti Spelling. I have used this for years in my classroom and my students seem to always enjoy it. It's easy to put together and fairly cheap to make.
To make Spaghetti Spelling you will need:
- 5 Sheets of red felt
- Cream colored yarn (You can use white, but the cream colored looks closer to spaghetti)
- A gallon Ziploc bag
I rounded the corners of the felt to shape it like a plate or platter. I thought red was a good fit because it would be like the sauce. Cut the cream colored yarn in all different sizes. You will want to cut a good amount so that you have enough for all the students in the center. I usually have four or five students in each center group. I always make sure I have enough materials for each student at the center. Students will use the spelling word index cards to practice spelling their words. The felt and yarn work well together because they cling to each other. It makes it easier for students to manipulate the yarn into letters and keeps their frustration level down. After they spell one word, they would select another card and spell that word. I store all five felt mats and the pile of yarn in a gallon Ziploc labeled "Spaghetti Spelling". It makes it easy for storing, set up and clean up.

This is a picture of how I store the center.

Another idea is to use toothpicks to make letters to practice spelling words. I suggest using the flat toothpicks. They are not as sharp and lay flat so it's easier to make letters and you don't have to worry about the toothpicks rolling around. This idea might not work well for all classes. Use your judgement. I know there were a couple of my classes that I would have never attempted this with.

I found an idea for paint writing on Pinterest and loved it! The idea was pinned from Scribble Doodle and Draw's Blog. You can read the post with this idea here. It looked like a lot of fun and the best part was you only needed four items. You will need a quart size freezer Ziploc (freezer bags are more durable), paint, a Q-tip and tape. Squirt some paint into the Ziploc and reseal it. Be sure to squeeze the air out. Tape the bag shut...I didn't do this for my picture, but I plan to tape it shut with blue duck tape before Madalyn uses it. After it is taped shut you can begin to write, draw, etc on the bag with a Q-tip. I think this will be lots of fun for students. You could use this to practice letters, sight words, spelling words, shapes, numbers, etc. It's a versatile tool for the classroom...and it's fun!

Pipe cleaners (or chenille stems....that sounds so funny to me) are another great tool for the classroom. You can put several in a basket and you have a ready made center. Students can bend the pipe cleaners to form letters and spell words. You can even extend it and have two colors for students to use. They can use one color for vowels and another for consonants. If you are unable to use the toothpick idea above you could use pipe cleaners instead. Just cut them to the length of a toothpick and remind students not to bend them.

My next idea is one I can't wait to try in the fall. It's a variation of a number order activity I found for Madalyn on Pinterest last summer. The number order idea came from the Tot School website. You can read the number order post here. Madalyn loved this idea, maybe because it combined craft sticks and Play-doh! I had her order numbers 1-20. While she was working on ordering the numbers I came up with two more ideas. I thought ordering the alphabet and using letters to spell words would be fun activities as well. I decided to have one color for vowels and another for consonants. I just used a marker to color the craft sticks in the picture. I am adding colored craft sticks to my ever growing "To Buy Before Fall" list. Seeing the two colors in their words will help them understand the importance of vowels and see patterns in their words.

My last idea is another easy and fun one that students enjoy. Are you seeing a pattern here? Easy...fun....students enjoy it... Writing in the sand is so fun and relaxing. Students really like it. To make one sand writing box will need a plastic pencil box, colored sand, and a pencil. It's really easy. The most expensive thing is the colored sand, but if you use a coupon at a craft store it's not too costly. Just fill the bottom of the pencil box with sand. You want enough in there so that the student can easily write the word and not scratch the bottom of the pencil box. Add a pencil and the words cards and you are ready to have fun! Below is the one that I made for Madalyn to practice her words. We had fun the day I made it. She wanted to see how long of a word we would have room to write, so we kept trying different words. She also liked drawing in it.

I hope you enjoy these center ideas!
Sunday, February 17, 2013
Spelling/Sight Word Practice Part 2
My favorite kindergartner and I had some fun this weekend taking pictures of some of the spelling centers I have used in my classroom over the years. She just started spelling in her kindergarten class a couple weeks ago. I wanted to show her some of the ways she could practice her spelling words at home. In my classroom I would have a different activity in the spelling center for each day of the week. My reading centers were typically four days a week. The fifth day was used for assessment and then I would let the students have a free choice of centers for review during the remainder of our reading block.
Weekly Activities for the Spelling Center:


Weekly Activities for the Spelling Center:
- Monday-Introduction of words, write 3 times each on white boards, sometimes I would have them pyramid write them
- Tuesday-Rainbow write the words
- Wednesday- *This is the day that I would rotate activities every couple of weeks to keep things fresh
- Spaghetti Spelling (More on this in Part 3)
- Stamp a Word (Eeeeek! This one would always be messy and drive me crazy! Any tips on making this center less stressful for me???)
- PomPom Spelling
- Letter Tiles (So noisy! I found a great and FREE alternative for this one.)
- Thursday- Play-Doh Spelling...My students LIVED for this one!
- Friday-Free choice after assessments
PomPom Spelling
This was an easy and fun way for students to practice their words. I would have a large Ziploc or basket filled with multi-colored PomPoms. You could even change the colors out to match the various seasons or holidays. I would have index cards with the weekly spelling or sight words written on them. They would choose a word and spell it out using the PomPoms. It was easy and the kids had lots of fun learning their words.

Letter Tiles...New and Improved....For FREE!
My school library has bins of plastic letter tiles that you can check out to use during the school year. Each year I would check them out and use them, but they were SO NOISY! My students would dump them on the table, which would make a loud crash. Then it seemed like they kept moving them around and around, making more noise. I found a MUCH quieter and FREE solution! I started cutting the large letters off of boxes. Cereal boxes, frozen food items, granola bars, fruit snacks, soda, drink boxes, etc. So easy and it's FREE! Before I put boxes in the recycle bin I cut off any letters I can use. I store them in a plastic dish in a kitchen junk drawer.

Students will use them the same way as the plastic letter tiles. They will choose a word card and spell it out using the letters.

Play-Doh Spelling
This was always a favorite with my students. They would pick one of their spelling words and roll Play-Doh snakes. They would then use the "snakes" to form letters to practice spelling their words. Simple and easy. I would have them do this activity at one of the students tables. After centers were finished for the day I would have members of my "Tidy Team" (two students selected that week to help clean up) clean the table with baby wipes.

I hope you enjoyed some of my spelling center ideas. If you have any questions, please let me know. I will have a Spelling/Sight Word Part 3 soon where I will explain "Spaghetti Spelling" and a few new ideas I have found while on maternity leave.
Thursday, February 14, 2013
Valentine's Day/Lunchbox Notes
Hi Mom.....if you are reading today. I love you!!!!
Today is Valentine's Day. I planned a special breakfast for Mike and Madalyn. Luke was still snoozing away in his crib. I made heart shaped pancakes and bacon. I try to always set the table the night before to make it easier in the morning.


This week I have also been adding special Valentine lunch notes in Madalyn and Mike's lunchbox. I usually add lunch notes but these were extra special. I found them and downloaded them a couple years ago. You can find them here. I also write a little note on the back. Madalyn likes reading hers since she is a reading machine now days.
I hope you had a special Valentine's Day!
Check back soon. I'm going to be posting more spelling and sight word practice ideas.
Today is Valentine's Day. I planned a special breakfast for Mike and Madalyn. Luke was still snoozing away in his crib. I made heart shaped pancakes and bacon. I try to always set the table the night before to make it easier in the morning.

I guess I should have turned the light on before taking the picture. =)

My heart pancake on the griddle. A little abstract, but so much easier than using a cookie cutter!

I used this awesome, BIG squirt bottle my Mom bought for me at Chef's Warehouse.

Two of my Valentines enjoying their breakfast. Luke had his later.

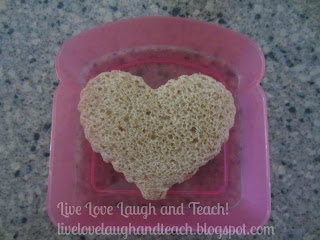
I packed Madalyn a special heart shaped fluffernutter sandwich (peanut butter and fluff).

I just made the sandwich like I usually do and used a large cookie cutter to cut it out. Easy and she loved it!

This week I have also been adding special Valentine lunch notes in Madalyn and Mike's lunchbox. I usually add lunch notes but these were extra special. I found them and downloaded them a couple years ago. You can find them here. I also write a little note on the back. Madalyn likes reading hers since she is a reading machine now days.
I hope you had a special Valentine's Day!
Check back soon. I'm going to be posting more spelling and sight word practice ideas.
Subscribe to:
Posts (Atom)